


Looking through a restaurant’s menu, website, or social media and discovering a plethora of tantalizing food photos is an unmatched experience. These photos not only please the eyes but are also crucial for the success of your food business.
Consider this: have you ever come across unappetizing or dull food photography that made you dismiss the brand altogether? This is why giving special attention to your food photos is so important.
The good news is that you don’t necessarily need to hire a professional food photographer or invest in expensive equipment. In this article, we will discuss some essential food photography tips to help you capture the best photos regardless of your budget.
1. Select the Perfect Background
The right backdrop and props can transform a mundane photo into a culinary masterpiece. Can you balance a detailed food item with a simple background? Or perhaps use an imaginative background to tell a story or transport viewers to a different world?
This is your opportunity to establish a unique aesthetic and brand identity for your business. For example, if you have a plant-based brand, consider using natural-looking backgrounds.
When choosing your backdrop, opt for something that enhances your dish rather than competing with it. A plain surface can work wonders by keeping the focus on your meal. Additionally, incorporating tableware, linens, and carefully selected accessories can help convey your brand’s personality.
Consider adding basic props like utensils and a napkin. This encourages the viewer to imagine eating the food immediately, increasing the likelihood of them engaging with your brand or making a purchase.
Another tip is to adorn the background with ingredients used in the dish. If there’s a garnish on top, scatter it around the area. If fresh fruits or vegetables are present, arrange them around the plate. You can also incorporate other props like fabrics and home decor items.
2. Arrange Your Lighting
Lighting is another crucial element that can make or break your food photos. You can choose between natural light or artificial lighting, depending on the dish being photographed and the availability of good natural light.
One key thing to remember is to avoid harsh lighting. This often occurs when the light source is too close to the food, resulting in shadows, overly bright spots, or highlighting the wrong parts of the dish.
To avoid this, position your lighting to the side of the food rather than directly in front of it, and ensure that the light source is far enough away to prevent shadows or bright spots.
As a general rule, utilize natural light whenever possible. If you have a well-lit room, consider placing your photography table close to it. If natural light isn’t accessible, consider investing in an affordable light and light diffuser. These tools can enhance your photos by providing adequate lighting without the pitfalls of harsh lighting.
Proper lighting brings out the texture of your dishes and sets the right ambiance for your images. Soft, diffused light offers uniform coverage, while intense, direct light can create unwanted shadows. Consider using a large, soft light source such as a window with frosted glass or a softbox attachment. You can also take your setup outdoors to utilize natural daylight.
Different dishes benefit from light coming from various directions. Overhead lighting works well for full table spreads, direct frontal lighting is ideal for social media posts, and angled side lighting can add drama to individual ingredients.
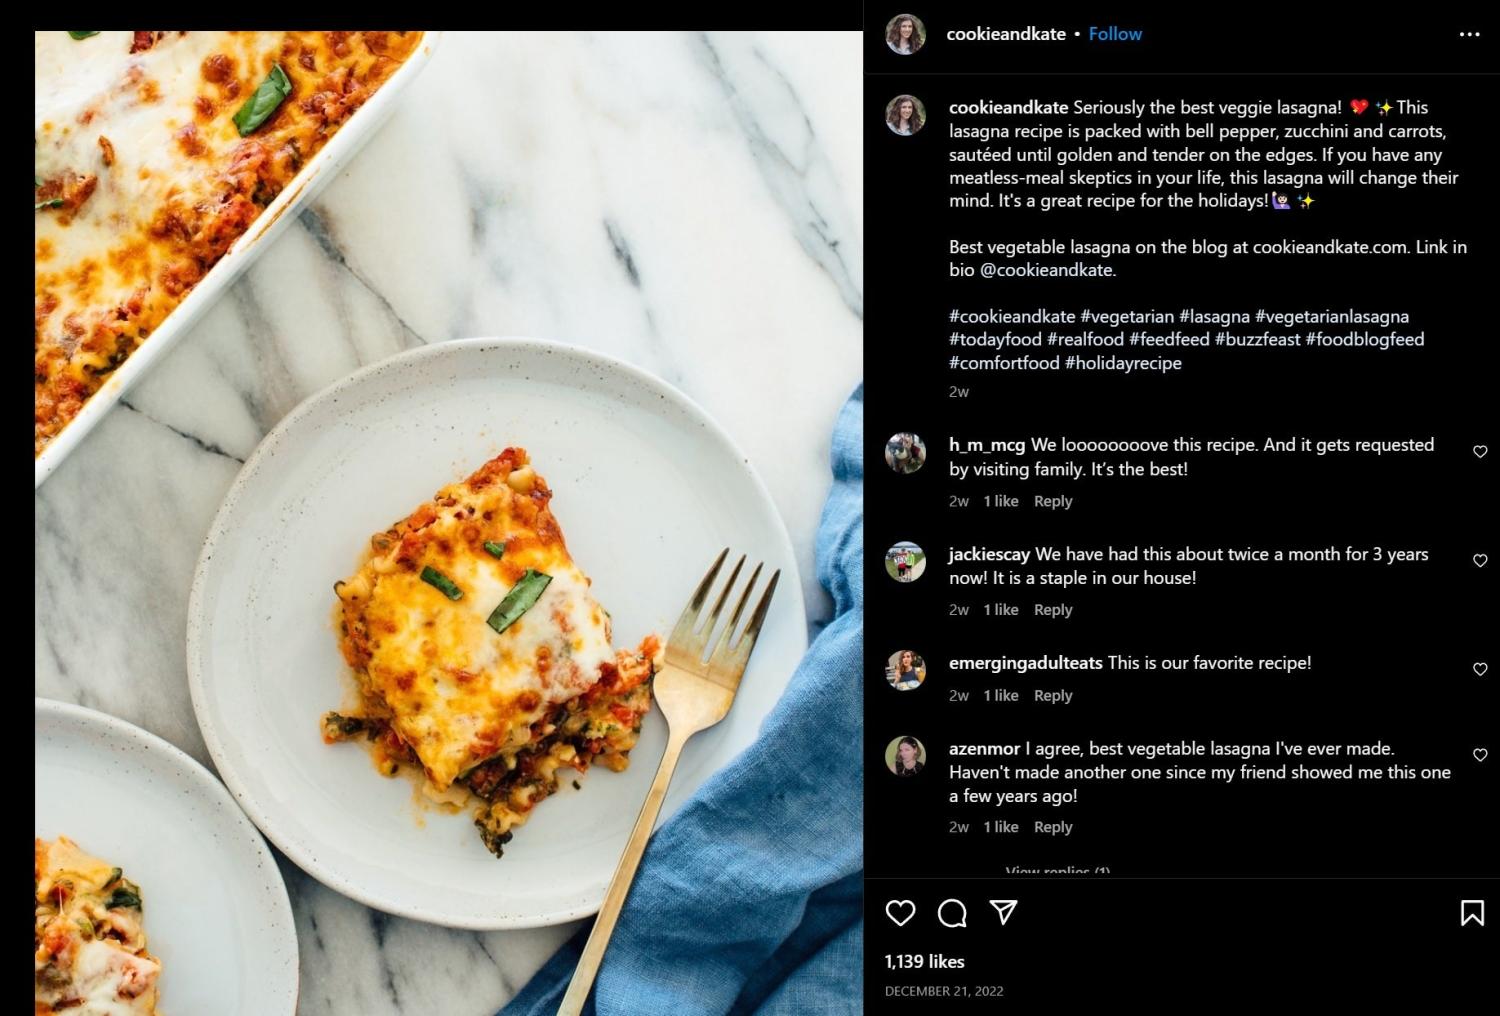
3. Perfect Your Food Arrangement
The presentation of your food is a critical aspect of making a strong first impression. The way you arrange your food sets the foundation for the aesthetic you aim to achieve with your food photos.
Here are some tips for effective plating:
- Ensure your food takes center stage in the photo. Typically, the focal point of your image should be positioned in the center. You can enhance this by placing it in the middle of the plate with extra space on the sides to create a sense of openness and draw the viewer’s attention.
- Don’t hesitate to think creatively. Experiment with using a squeeze bottle for sauce to create artistic lines on the plate or employ tweezers to meticulously place garnishes. Some of the most captivating food shots pay meticulous attention to detail.
- Plate your food based on the nature of the meal. For colorful and naturally “chaotic” dishes like salads, you don’t need to meticulously arrange each component. However, for dishes focused on design, such as decorative cakes, use your plating to establish a sense of order and harmony.

4. Experiment with Various Framings and Angles
While shooting food photography from directly above is a common technique among professional photographers, it’s not the only option. Try exploring different angles and shooting styles to discover what works best for your subject.
For instance, a charcuterie board may look best from above, while a cross-section of a triple-decker sandwich may require a side view.
Capture your food from multiple angles, then select the best shots afterwards.
Additionally, consider playing with different shooting styles, such as using depth of field to focus on specific parts of the dish while leaving other areas slightly out of focus. This adds an artistic flair and allows you to highlight interesting textures.
When composing your shots, remember that an excessive number of elements can detract from your main subject. While centering your dish may seem intuitive, it doesn’t always result in the most engaging image. Experiment with dividing your frame into three equal sections both horizontally and vertically, then position your main subject along these grid lines to capture attention more effectively.

5. Stabilize Your Camera
Maintaining a steady camera is crucial for capturing sharp, professional-looking images. If your hands are shaky, your photos will turn out blurry, missing the finer details of your dishes.
Mount your camera on a tripod or camera stand to eliminate movement and ensure clear, sharp images. A tripod with adjustable controls allows for precise positioning, making it easier to capture your subject from the perfect angle. Camera stands are particularly handy when you need to switch quickly between vertical and horizontal orientations.
For overhead shots that showcase a full spread of a meal, photographers often use overhead mounting systems or boom arms to keep the camera stable above the table. This setup is ideal for capturing flat lays and table scenes from directly above.
6. Enhance Your Food Photos
After your photo session, consider making subtle edits using a photo editing app.
You might opt for a paid tool like Adobe Lightroom if it fits your budget. However, there are plenty of free photo editing tools available as well.
When editing, remember to take a conservative approach. For example, you can adjust shading and color balance slightly to make your food images appear more natural and appealing.
Other editing tips to keep in mind:
- Enhance sharpness to define the edges of the image.
- Use a warmer white balance to make the food more inviting.
- Increase contrast between dark and light areas to enhance detail.
- Slightly boost the saturation of your food photos to bring out the colors of the subject.
In addition to software editing, think of creative ways to play with your food. Consider making biscuits shaped like adorable animals or using dough to craft a landscape. A unique approach to food photography will increase your chances of attracting social media users. Furthermore, you’ll create distinctive media assets for a food blog if you choose to launch or contribute to one in the future.
Remember that your food photos should accurately represent what customers receive when they order from you. Mismanaging expectations can significantly harm your brand, as people dislike being misled about delicious food only to receive something that doesn’t meet their expectations.
Advanced Food Photography Techniques
Ready to elevate your food photography skills? Here are some advanced techniques to help you produce even more stunning images:
Experiment with Different Lenses
Your choice of lens can have a significant impact. Macro lenses allow for extreme close-ups, capturing minute details like individual salt grains or pastry textures. These lenses offer extended focal lengths and higher magnification capabilities compared to standard lenses.
For truly unique perspectives, probe lenses feature a long, narrow barrel that can fit into tight spaces. Imagine shooting through a donut hole or capturing the viewpoint of a chef.
Utilize Light Modifiers and Filters
You can soften light by placing diffusion materials between your light source and subject. Professional photographers use specialized diffusion products, but even a simple white sheet can suffice in a pinch.
For added visual interest, special filters can create effects like light streaks emanating from bright points in your image. These are ideal for enhancing the drama of a cocktail glass or candle. Light modifiers such as nets and flags help you control where light falls, either blocking it entirely or gradually reducing its intensity in specific areas.
Experiment with Focus Stacking
Focus stacking involves taking multiple photos of the same subject with different focus points, then merging them using software to create a single image where everything is sharp. This technique is particularly useful for extreme close-ups where it’s challenging to keep everything in focus in a single shot.
Professional cameras with large sensors simplify this process, but smartphone users can also explore focus stacking using dedicated apps.
Achieve Accurate Colors
Accurate colors are crucial in food photography but can be tricky to achieve. A color checker tool can help you attain precise colors during editing. Place it in your shot during the photo session and later use specialized software plugins to calibrate your images based on those reference colors, ensuring your food appears as true-to-life as possible.
Monitor Your Images in Real-Time
Connect your camera to a computer to review your photos on a larger screen while shooting. Programs like Adobe Lightroom and Capture One are compatible with most major camera brands and automatically transfer images to your computer, eliminating the need to import photos later or worry about filling up memory cards. Viewing your work immediately on a larger screen enables you to identify issues early on so you can address them promptly.
Understanding Camera Settings for Food Photography
If you’re using a DSLR or mirrorless camera, mastering manual settings will provide greater control over your final images. Here are the key settings to consider:
Aperture
Aperture regulates the amount of light entering your camera and influences the depth of field in your image. Measured in f-stops, lower numbers indicate wider openings and more light. A wide aperture (e.g., f/2.8) produces a shallow focus area, blurring the background, while a narrow aperture (e.g., f/22) maintains sharpness from front to back.
For food photography with a full-frame camera, a mid-range setting like f/11 typically yields the sharpest results, striking a balance between overall clarity and fine detail.
Shutter Speed
Shutter speed determines how long your camera’s sensor is exposed to light. Slower speeds (e.g., 1/15th of a second) allow more light but can blur motion, which is useful in natural light settings. Faster speeds (e.g., 1/1,000th of a second) freeze action, ideal for capturing dynamic moments like pouring liquids or rising bubbles.
When using flash, check your camera’s flash sync speed (typically 1/200 second). Faster speeds reduce ambient light in your image, granting more control over your lighting when using artificial light sources.
ISO
ISO adjusts your camera’s sensitivity to light. Lower values (e.g., 100) are best for bright conditions, delivering clean images with minimal noise. Higher values (e.g., 3,200) are more light-sensitive but introduce more noise, potentially affecting color clarity and shadow detail.
For food photography, use the lowest ISO possible while ensuring proper exposure. Refer to your camera’s native ISO (usually between 100 and 200) for optimal image quality.
White Balance
Various light sources emit different color temperatures, measured in Kelvin. Incandescent bulbs emit warm, orange-toned light (around 2,700 K), while overcast daylight appears cooler and bluer (around 6,000 K). Your camera’s white balance setting corrects these color casts.
Avoid mixing warm and cool light sources in the same shot, as this can lead to color balance issues that are challenging to rectify later on. If you’re using daylight or flash, turn off any artificial lights in the room.
Becoming Proficient in Food Photography
As evident, delving into food photography is not as daunting as it may appear. For beginners, focus on your background, lighting, plating, framing, and subtle editing. While you may need to pick up new skills, don’t let that discourage you from diving in. With an open mind and a willingness to learn along the way, you’ll be amazed at what you can achieve.
So, go out there and capture some irresistible food photos.
Food Photography FAQ
Can You Capture Great Food Photos with Your Phone?
Absolutely! You can capture fantastic food images with your phone. The quality of smartphone cameras continues to improve, eliminating the need for a DSLR camera to take stunning food photos. Simply follow our food photography tips to ensure you get the perfect shot.
How Can You Make Food Look Appealing in Photos?
- Choose a suitable background that complements your dish without overshadowing it.
- Arrange your plating and cutlery before starting your photoshoot.
- Experiment with different angles, compositions, and depths of field.
- Light your food from the side with soft light, opting for natural colors over cool tones.
- Use a tripod to stabilize your camera for sharp, clear images.
- Make subtle edits to your images for saturation, contrast, and sharpness to bring out the warm tones of your food.
How Can You Capture Food Pictures Without Shadows?
To avoid shadows in food photos, steer clear of direct, intense sunlight and position a large, soft light source near your subject. Shooting in shaded outdoor areas or near a window with indirect light will yield the best results. Additionally, using diffusion materials between your light source and food can help create even, shadow-free lighting.
What Camera Settings Are Ideal for Food Photography?
When photographing food, keep your ISO as low as possible to minimize noise and digital artifacts. Opt for an aperture around f/11 for maximum sharpness and adequate depth. Adjust your shutter speed based on available light and motion in the scene. Match your white balance to the lighting conditions, avoiding mixing different types of light. Shooting in RAW format allows for greater flexibility in post-processing.
Want to Learn More?


